Friday, August 31, 2007

Blogger's Challenge Week 11 - This one was hard!


This one was sooo tough. The challenge was to
use the Circus Train card from page 92 of the Stampin' Up! catalog as inspiration. I struggled with this one! I did not find the layout appealing initially -- very plain backgrounds just don't do it for me! After an hour of struggle, I finally was inspired. I have to admit, this started out simpler -- but I just kept going and going... It has ALOT of elements, but I actually like it!

Make sure to check out the other Blogger's Challenge cards from the ladies in the group --
you will be amazed at the absolute variety and creative thinking that was put into this.
Perfect Presentation, Season of Joy, Snowburst, All in a Row Stampin' Up! Stamps; Papers and ink: Colorbox, SU!, Memories

Thursday, August 30, 2007

Tag Flower Challenge Results


At the end of last week's Blogger's Challenge, I challenged YOU to make a tag flower card using the tutorial I presented. What great cards were submitted! All of the submissions are in the slide show below -- thanks to all of you!

I randomly picked three people to receive the cards I made last week from the entries. Vera LeMarsh, Betsy Hawkins and Ronnie Crowley will all be receiving tag flower cards from me.

Of course, I couldn't resist making just one more... It is on the right. It was made with Close To My Heart's Adorable Stamps and Wild Asparagus Paper.

Enjoy the slide show!

Tuesday, August 28, 2007

Bright and Colorful Creations

I joined a color challenge on one of Yahoo lists last week to use Tempting Turquoise, Pumpkin Pie and (either) Green Galore or Garden Green to create a card for a partner. Well, if you read this blog, you know me -- I can't just make one! I made three for this challenge and had my kids select which one went to my partner.

Since the list this was for is strictly Stampin' Up!, the materials listed below are all from SU. The top card uses the Fabulous Flowers, Brocade Basics and So Many Sayings Sets. To make the large flower:
  1. Color the flower with markers in the colors desired. I used turquoise on the center petals and green on the outer petals.
  2. Spritz the flower with water and stamp on white CS.
  3. Spritz stamp again and stamp the flower on the green panel to make the background paper. Note: I spritzed and stamped several times for multiple images.
  4. Allow the flower to dry, cut out, add pop-dots, and pull up some of the petals around the edge for more dimension.

The second card, on the left, was made using the Priceless and So Many Sayings Sets. Note that I Made a Popcorn Scallop Border and added eyelets in every other lower scallop. Directions for creating the popcorn scallop border are here. I also used a flower from the Pretties kit and colored it with dye reinker and water.

The final card (below) uses the Wanted, Fabulous Flowers and Priceless sets, along with the Sanded background. The words and the orange dots are covered with Crystal Effects. It is very striking in person! This is the card I sent to my partner. I think my boys chose it because it is a very in-your-face card -- the words just pop right off the page.

This is not a combination that I have ever worked with before, so it was a little challenging for me! I really like it, though -- such striking cards. So, which is your favorite?

Saturday, August 25, 2007

New Stamps, A New Z-Fold

Two weeks ago I was contacted by a former subscriber who wanted to take advantage of the special pricing I had on my site a few weeks ago. She wanted to resubscribe to the TJ Newsletter and she was especially interested in the Z-Fold card from the August 2007 issue. I told her that if she re-subbed, I would send her one.
This week I returned from vacation and found these gorgeous SU stamps on my doorstep. I just had to make her a new card! Who cares that I have 6 or 7 other samples I could have sent...they won't go to waste, I'm sure.

In any case, this card uses Stampin' Up!'s True Friend set, along with various papers. I think the designer paper is from Daisy D. Hope you like her card (and I hope she does, too). I have to say -- I just LOVE the die cut rubber!

Friday, August 24, 2007

Blogger's Challenge Week 9 "Get Punchy"- With a how-to

This Friday's Blogger's Challenge was to use Punches on our creations. I had been tossing ideas around in my head all week for this and had several ideas, then I received a RAK from Kelly Mahoney that inspired my card. Using a tag punch to create a flower was new to me; since I received the card I have seen several on the net. I suspect, though, that this idea may be new to some of you, too, so I have included the "how-to" directions below. I hope you enjoy!
I also couldn't just make ONE card. I made two this week! The one above uses a small tag punch for the flower and a Key-tag punch for the word window. I love double-sided paper! So many options. I used Stampin' Up!'s Priceless set, Sanded Background Stamp, designer paper and cardstock for this one. I also used my Scor-It board for making the ridge around the top panel.
This is the second card I made:

The paper for the flowers was originally cream and brown; I brayered turquoise ink all over it to change it to the colors I wanted. This is not my original idea, it was an idea was introduced to me by Lisa Somerville.
Teal, Red,Brown and Gold (looks like cream, but it is gold)! I am certainly working hard at expanding my color palette, don't you think?

The background and "friendship" are both from SU's Tres Chic Background -- the doodles are from SU's Priceless set. I also used a ticket punch in some of the corners, too.


Here is Kelly Mahoney's card to me that inspired this adventure:
I love the rhinestone brad in the center of Kelly's flower.


Want to know how to make these tag-flowers? Here is how:
- Start by punching a 8 small (or 7 large) tags from double-sided paper.


- Fold the bottom left corner up to meet the opposite edge, from straight edge to straight edge, as shown.


- Fold the top
right corner of the triangle to meet the fold on the left side. You just made your first "petal!" Repeat with remaining tags.

- To assemble, find the center point on your prepared background and adhere the tag-petals around it in a circle, butting edges against each other to create the flower. Add a brad, button, bead, chipboard or glitter in the center and you are done!


Here is a challenge for YOU -- try the punch flower and email me your creations. I will post them next Wednesday and mail my cards to two randomly drawn entrants.
My email address is:
phuntoon@optonline.net

If you prefer, send me the URL of where I can find your posting in the comments and I will post it from there. Hope you will play along!

Make sure to check out the other Blogger's Challenge players listed in the left column. I am always amazed at the creativity and sheer variety of talent on this great challenge group!

Thursday, August 23, 2007

Nice Matters Award

Lisa Somerville awarded me the "Nice Matters Award -- thanks, Lisa! According to Lisa's blog, "This award is for those bloggers who are nice people; good blog friends and those who inspire good feelings and inspiration. It is also for those who are a positive influence on our blogging world.
Once you've been awarded please pass it on to others who you feel are deserving of this award." Thanks, Lisa! There are so many great bloggers out there -- I can't pick just a few!
Lisa would be MY number one choice, though...

Wednesday, August 22, 2007

Another batty card with a peek-a-boo window


I meant to share this yesterday -- I made this as an alternative to the card yesterday, but ended up keeping this one. Directions for the window are here.

I have a ton of cards to share -- I just need to take some pictures of them!

Tuesday, August 21, 2007

Batty for this matted peek-a-boo punch idea...

I made this card for a Halloween challenge recently. While I was making it, I decided I "needed" to have the "Frankenstein" paper punched through to the bottom as a window, and I wanted a double matted look on top.

I love how this looks in real life -- it is so dimensional!

This is so easy to do! Here's how did it.:


Line up the base cardstock and punch window.

Place top layer under punched area, and trace the window with a pencil.


Punch on lines. Keep the layer in the punch.


Using the lines as a guide, move the punch slightly to the left and punch again (you are making the window slightly wider.


  • Repeat on opposite side.

  • Use punch to trim any uneven edges.


  • Layer on card as desired.


Stamps: Stampin' Up!, Batty, Sanded Background; Designer Paper; Pumpkin Pie, Basic Black, Charcoal Grey, Whisper White Cardstock; Black ink; Glitter Jimmies


Saturday, August 18, 2007

Blogger's Challenge Week 8 - "Inspired by...."

Hurray! I am back from vacation and I have colorful fingers again! It felt good to dig into my inks and stamp. This week's challenge was to use something around us as inspiration for creating art. Here is my piece:

This was inspired by a chair in my Retro-70's decorated family room. Yes, I decorated my family room in geometric patterns of olive, browns, reds and oranges. I love the room -- and the inspiration for the room itself came from the chair I used as my challenge piece. I really like the dark background with the green circles -- and there is no better way to mimic this than to use the Joseph's Coat Technique.

Here's how to get the multi-colored Joseph's Coat look like I did here:
  1. Stamp the circle patterns (Stampin' Up! Big Pieces) with olive pigment ink on white glossy paper. Space the patterns about 2" apart.
  2. Immediate cover with clear embossing powder and heat emboss.
  3. Cut into strips so that the same patterns are on one strip.
  4. Brayer Orange, Red and Brown DYE inks over the strips. Note that some of the pieces were brayered on one half with red, and one half brown to mimic the chair.
  5. Allow ink to dry and rub excess ink off of the embossed areas.
  6. Cut into 1-1/2" strips and attach to background.

I covered the Joseph's Coat Technique in the Technique Junkie Newsletter in 2002 -- time flies!!!

I am thrilled to be back from vacation -- mainly because I received orders from SU!, CTMH AND TAC during the last week and I have been itching to play with all of it! My vacation was great though, and it was a treat to relax, soak in the sun, read books, play and swim. I am so lucky! A great vacation, and lots of cool stuff to come home to. It just doesn't get any better, does it?

Saturday, August 11, 2007

Bloggers challenge week 6 (or is it 7?)


I am on vacation, so I am a little out of it -- I guess my brain turned off. As you can see, I have an internet connection, but I have to type fast so DH doesn't see me -- we are off to the beach in a minute!

In any case, this is something I made for an exchange partner a month or so ago -- I didn't have time to make anything fresh before I left. I do have a tutorial later for you later this week, though! Now that I know we have a connection, I can get it online later in the week.

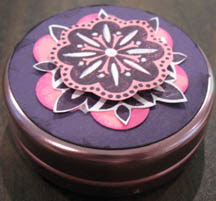
Anyway, this weeks challenge was to alter something. This started as a tea tin -- and now it is a bead tin! The next thing was just a little jar that I had that I put ribbons into and decorated with punches, flowers and tags. Thanks for visiting!

Tuesday, August 7, 2007

A new way to use them...


I have a bunch of Anita's (and Outline) Art Stickers that I rarely use. I was on a buying jag (does that surprise anyone?) at a Stamp Convention and I was very enthusiastic about using them on my art. Two years later...and I haven't used them much at all.

I pulled some out the other day to make some ATCs for a swap. I discovered something really cool! By coloring the stickers with Sakura's Gelly Roll Pens and letting them dry, then pulling up the stickers, you can get a whole new look. I made two ATCs -- one with the Sticker still on the ATC, and one with it off...

I like them both!
All Stamps: Close To My Heart

Monday, August 6, 2007

Challenge for a Girl -- Don't look Leigh!

I recently participated in a one-on-one swap where the idea was to "Challenge Your Partner." We were assigned partners and each person had to send items to the other. When you received your items, you were to make a card and return it to the sender.
My partner was Leigh O'Brien. If you are not familiar with Leigh, you should be! She is a great stamper with a phenomenal eye for color and design. Her work continuously inspires me! I was fun to have her as a partner.

Leigh sent me the pile of items shown here, with instructions to make a "girly" card (and to try to use some stamps, to LOL). I am always excited to make girl things -- I have two boys and I live in a testosterone filled world. Well, as you can see, she gave me alot to choose from! I ended up creating the card on the right with her items.

I hope Leigh likes this card -- I loved making it for her!

Leigh posted her creation to me on her blog - go take a look! I had to peek : ) I can't wait to see it in person!

Sunday, August 5, 2007

Punched Petal Flowers

I've been meaning to post this card here for a while. I was playing with my oval punch a few weeks ago (while waiting for a stamp order to arrive), and made this dimensional flower with my Stampin' Up! oval punch.


Although making these are really easy and pretty obvious to make, I thought I might go through a quick "how-to" to make them.

To make a your own flowers, punch 7 ovals from patterned paper. Ink the edges with a matching color, then use a pencil in the center of each oval (lengthwise) to curve the edges a bit.

Prepare the background paper and place a glue dot for each petal 1" from the center of where the flower will be placed on the background. Then flip each petal over and place a mini-glue dot on the left side of each petal about 1/2" from the end. Start to place the petals on the background by placing the petals around the circle. As you place each petal, gently press the petal down into the glue dot. Pinch the left side of each petal into the right side of the petal next to it. Add a button on top with a Pop-Dot to complete the flower.

Have fun with these!
Stamps & Paper: Stampin' Up!


Thursday, August 2, 2007

Friday Blogger's Challenge: Week 6


Week 6 of the Friday Blogger's Challenge group was to create a card using the sketch on page 165 of the Stampin' Up! Idea Book and Catalog. I liked the card in the catalog -- it uses nice big whimsical flowers and is a very feminine card. I really wanted to see if I could "mix it up" a bit by creating a decidedly masculine card with a more classical looking set. I really like this stamp set, so I have been trying to stamp with these images whenever I can!

Take a minute or two today to visit the other stampers in the Blogger's Challenge group -- the variety of artwork you will see with these ladies is outstanding!

Recipe:
Stamps: Stampin' Up! Wanted set.
Cardstock & Ink: Mellow Moss, River Rock, Chocolate Chip; Outlaw Designer Paper
Other: Various Punches, River Rock Double-Stitched Ribbon, Vanilla Brads, Pop-Dots

Do YOU have a challenge for me? Email me: phuntoon@optonline.net

This made my day!

Did you ever get an email that you read over and over (and over and over)? This is one that I received that just keeps me smiling!

"Dear Pat,

I just had to write to you. I ordered all past techniques CD's and have been getting newsletters for several months. I also have to admit that I am a SU demo and haven't ever taken the time to open these and look at them until I got my latest newsletter yesterday. I opened that because I've seen a few artwork emails lately showing the 'Z Fold card', and that made me look further as I wanted the scoring dimensions. I looked thru the newsletter and saw several beautiful cards and 'text' tutorials. Well, these were 'interesting' but didn't get me real excited, and I found I was going to have to go online to get the z-fold info. So, I dug out the original email you sent me and logged on with the id and password.

Oh, WOW!! I surely didn't know what I'd been missing!! I've now spent the last few hours going through just this latest newsletter tutorials...now THESE ARE TUTORIALS!! Then, of course, I thought I ought to check the other artwork using the techniques. DOUBLE WOW!

I am so sorry I haven't been using this resource ... but, be assured, I will NOW!!

BTW, my favorites this month are the Veined Marble, Stippled Frames, Burnished Watercolors, and Melted Medallions (I'll have to get a melting pot!!). Can't wait to try these!
I'm off to SU convention this week but when I get home my first purchase will be webbing spray!

Thanks so much for a really wonderful, well-put-together website, filled with awesome creativity!! Better late than never, I guess (that's me finding what I was missing!)

Thanks again,
Crystal F"


Thank you, Crystal! It is so important to me that you love the site!

Wednesday, August 1, 2007

Bleached Gratitude...


This card was made for a recent class I taught on Bleach Overstamping. The images were bleached out, over stamped with the same image (using a stamp positioner) and colored with pastels. Simple cards!
This was a technique I did 3 years ago (or more!)...sometimes they just won't go away~
Stamps: Stampin' Up! With Gratitude, That's Nice